Friday, September 29, 2023

Quilt News! Improv/Wonky or Liberated Small Quilt Border Piecing Progress, And a Quick Look Back Paying Homage to Quilter Gwen Marston, Happy Fall!


Purple strip on the left new, plus yellow/green border all around.

New improv/wonky Flying Geese border on the right.
Border in solids added all around.
Four rows of small improv blocks with yellow/green strips between blocks from this to....


...this, strips of yellow/green between each row.


Hello Quilt Friends! Happy fall! The rain has cleared and we are off to a sunny fall day.

Some progress to report on my small quilts to be used as table toppers, mug rugs etc. for gifts for the up coming holidays.

I'm having fun piecing improv/wonky/liberated borders. Many quilters prefer to use the word wonky or liberated instead of improv and I can understand that. Some improv quilters have made improv to be a very complicated process maybe because they are trying to sell their book as well as their particular method of improv.
Which is just fine but it can add a little confusion.
 
Gwen Marston in her books, Liberated Quiltmaking ll and Liberated Medallion Quilts, both published by American Quilters Society, cuts through the fog and explains that liberated quilt making has actually been going on for a long time and it's not as difficult as you might be led to believe. Gwen left us with many excellent quilts and books to document her thinking and we are all indebted to her. Thank you Gwen.
 
Also visit Audrey to see her fabulous liberated piecing projects. A couple of her quilts were chosen to be on display at the New England Quilt Museum now showing a fine selection of Gwen Marston Quilts.

Now back to liberated scrappy, piecing.
Have a wonderful day and I'll be by to visit.


Wednesday, September 13, 2023

Quilt News! Improv Saw Tooth Border Tutorial, Log Cabin Improv Quilt Pin Basted, Hand Quilting Progress, Zinnia Needle Point Project Finish!

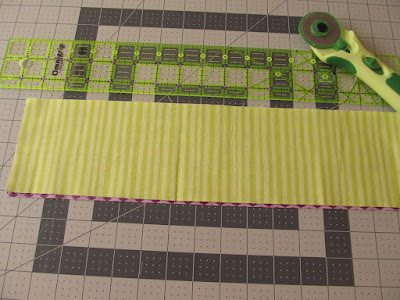
Improv Saw Tooth Border tutorial #1, cut two contrasting fabrics the same length and width.
Improv Saw Tooth Border tutorial #2; layer fabrics right sides facing up.
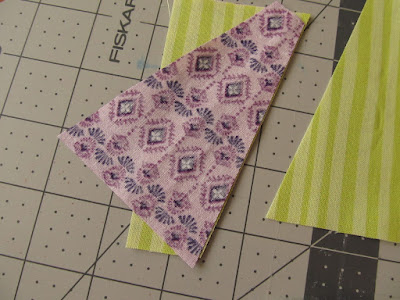
Improv Saw Tooth Border tutorial #3; slice with gentle angles, slip bottom fabric on top every other 'tooth.'
Improv Saw Tooth Border tutorial #4; with right sides together sew 'teeth' together with 1/4" seam, continue until all 'teeth' are sewn together then press seams to one side.


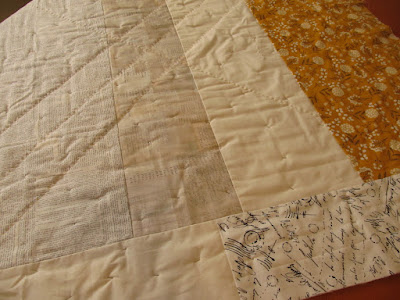
Log Cabin Improv quilt pieced back view.

I'm hand quilting my Log Cabin Improv quilt with Pearl Cotton #8.

Zinnia needle point project is finished, 5 x 5"!


 Hello Quilt Friends! 

Fall is right around the corner, exciting right? I enjoy the seeing the pumpkins and squash at the local markets and farmer's markets. Our family's fall birthdays are coming right up too.

This week I'm working on hand quilting my Log Cabin Improv quilt. I'm using Cotton Pearl #8 in Topaz. And in my last post I wrote that I was going to hand baste it but I did not! I pin basted it and that works out fine too.

I'm starting to piece together new Improv Saw Tooth borders for my small quilt mug rugs and table/kitchen mats as you see in the brief tutorial above. I'll have them finished for gifts for the holidays soon. I think they'll be colorful and useful.

And I finished my Zinnia needle point project. Needle Point is like a color puzzle to me and I enjoy the challenge. I think mindset has everything to do with hand work. I'll block it and tack it to a 5 x 5" frame. I don't put my pieces under glass, just preference. 

And that is the news from the valley where soon fall colors will blaze the landscape.

What fall projects are you working on? I'll be by to visit!